| English | Japanese |
|
|
Yesterdays access |
| Page Top | [Lily Diary.】 A diary of life in Mindanao. |
| 26/06/16 | Installing an AS5600 magnetic encoder on a KR-500. |
| 26/06/05 | Grandson Zion's CQ |
| 26/06/04 | Replacing the potentiometer on the KR-500 elevation rotator |
| 26/06/03 | Making a Repeater Controller Pert4 |
| 26/06/01 | Weather Monitor software |
| 26/05/31 | Weather Monitor |
| 26/05/21 | JTDX Auto Run BUGFIX |
| 26/05/17 | Repair of satellite antenna system |
| 26/05/13 | Repair of Alinco DR130 |
| 26/05/07 | Making a Repeater Controller Pert3 |
| 26/05/03 | Indonesian satellite friend YC8RPK |
| 26/04/26 | DXCC200 achieved |
| 26/04/23 | Communication via ISS voice repeater |
| 26/04/20 | WSJT-X Auto Run Ver0.1.5 |
| 26/04/19 | Got an Alinco DR-130 |
| 26/04/15 | Clublog Charts |
| 26/04/10 | Regarding POC transceivers |
| 26/04/08 | Using KENWOOD AT-300 with YAESU radio |
| 26/03/17 | How to establish a radio club in the Philippines |
| 26/03/10 | KENWOOD AT-300 with YAESU radio |
| 26/02/27 | Philippine NTC Amateur Radio License Examination Question Bank |
| 26/02/20 | Package received from JK1SNS |
| 26/02/18 | Temporary License Renewal |
| 26/02/14 | Satellite Tracking Software SatTrack |
| 26/02/05 | Making a Repeater Controller Pert2 |
| 26/02/02 | CQ on satellite IO-86 |
| 26/01/27 | Shack & Repeater Controller |
| 26/01/16 | Making a Repeater Controller |
| 26/01/16 | Making aRotator Interface PCB |
| 26/01/10 | Satellite antenna installation |
| 26/01/08 | WSJT-X Remote Operation |
| 26/01/07 | JTDX Remote Operation |
| 26/01/04 | log_reciver_Ver2.6.6 |
| 26/01/04 | Tailscale VPN software for JTDX_Remote |
| Online Multiple Choice Reviewers to the Phil Amateur Radio Examination by 4F3EW A joint project by JI1FGX/DU9 and DV9JRD |
| Making a Repeater Controller Part 2 (2026/02/05) | ||||||||||||||||||||||
| Video of the repeater controller in action. |
||||||||||||||||||||||
| Debugging of the repeater controller software and configuration software is complete. Analog interface boards and digital boards are manufactured by Chinese board manufacturersJLCPCB.I placed an order with .
|
||||||||||||||||||||||
| Repeater controller touch panel LCD screen. This is the idle standby screen 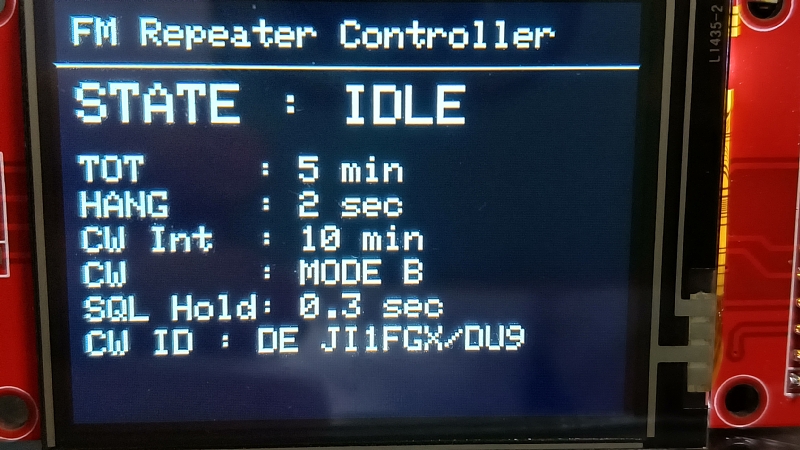 |
||||||||||||||||||||||
Uplink has input signal and downlink is in transmit state 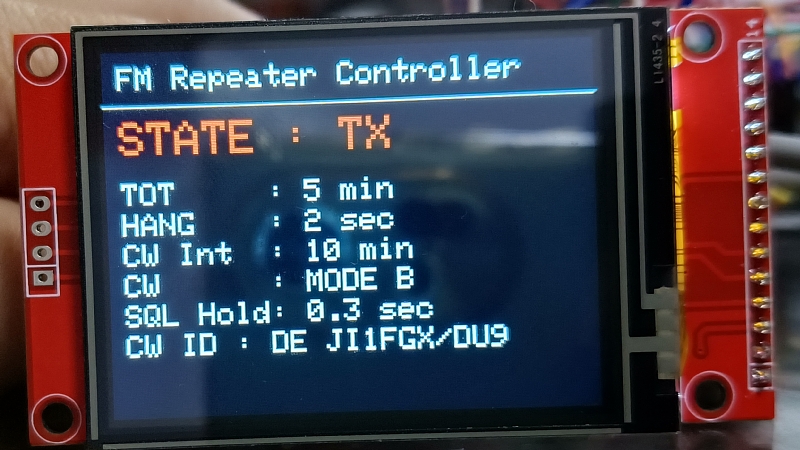 |
||||||||||||||||||||||
| Hanging up. Even if the uplink is lost, transmission continues for the time set by HANG. 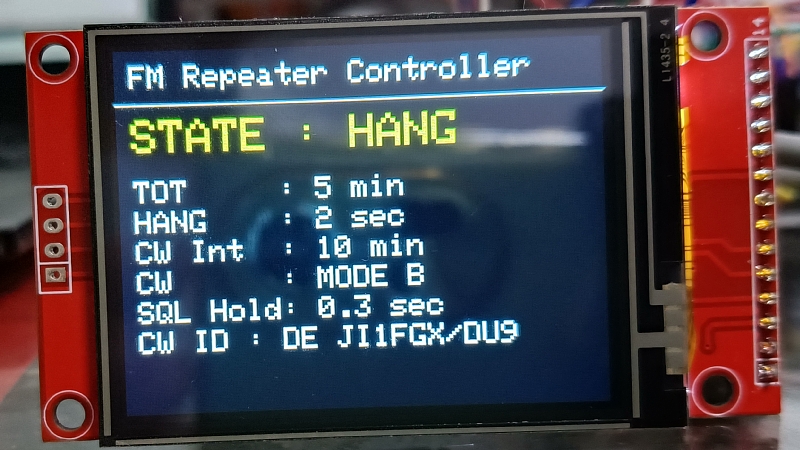
|
||||||||||||||||||||||
Sending CW ID.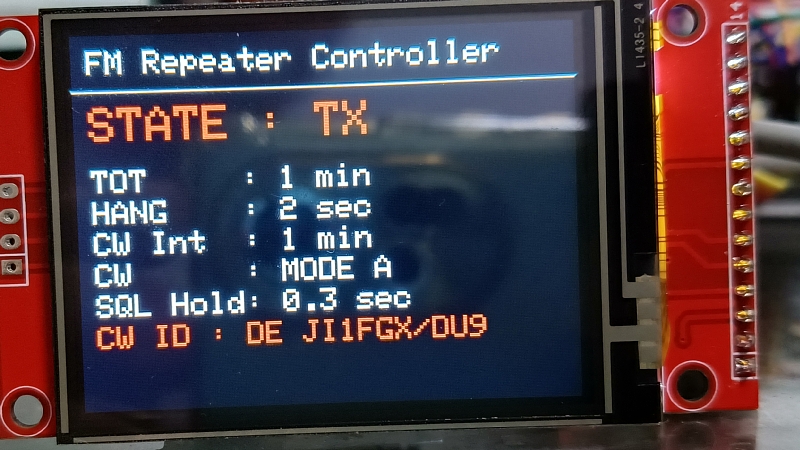 |
||||||||||||||||||||||
TOT timer to prevent consecutive accesses.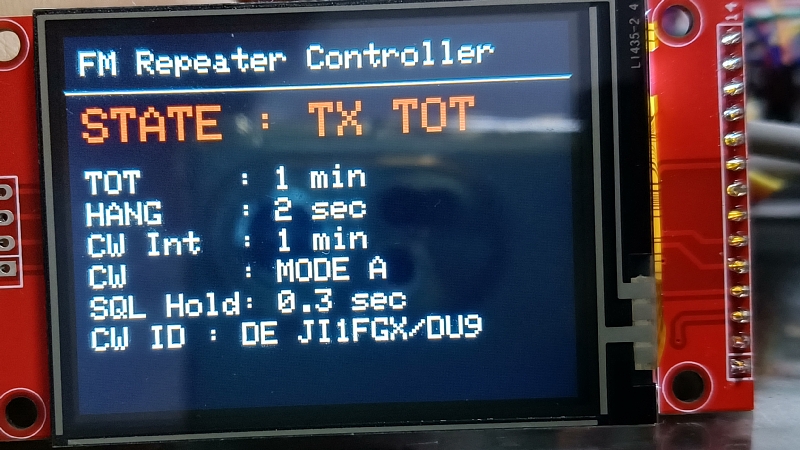 |
||||||||||||||||||||||
| Settings screen. Tap each item to change the value. TOT 1 minute to 30 minutes  |
||||||||||||||||||||||
| Hangup Time From 0 to 30 seconds  |
||||||||||||||||||||||
| CW transmission interval. You can set it to 1 minute (for testing), 5 minutes, 10 minutes, 15 minutes, or 30 minutes. 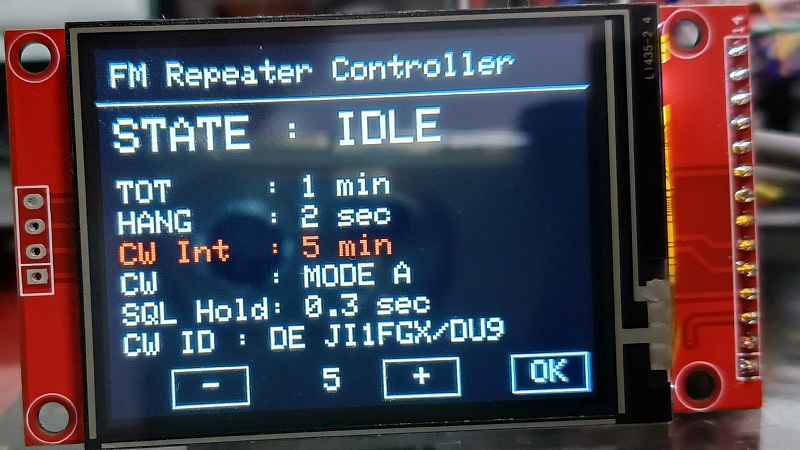 |
||||||||||||||||||||||
CW MODE.
 |
||||||||||||||||||||||
Squelch open time Timer delay to avoid unnecessary transmission due to noise etc. It can be set from 0 to 50 seconds. 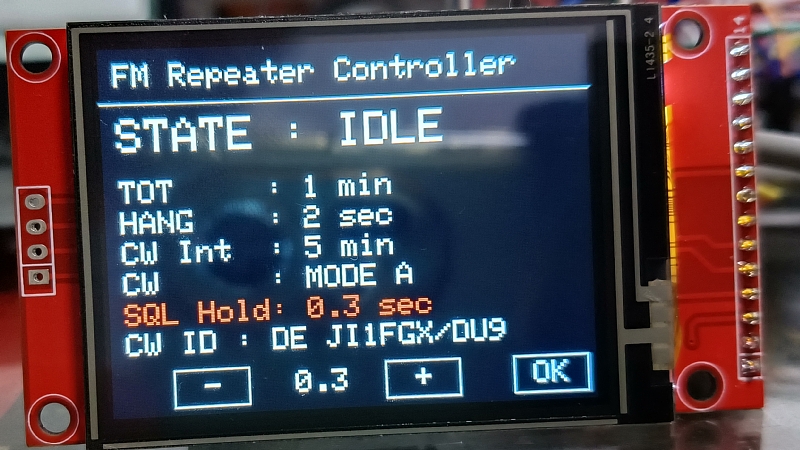 |
||||||||||||||||||||||
CW ID callsign editing screen.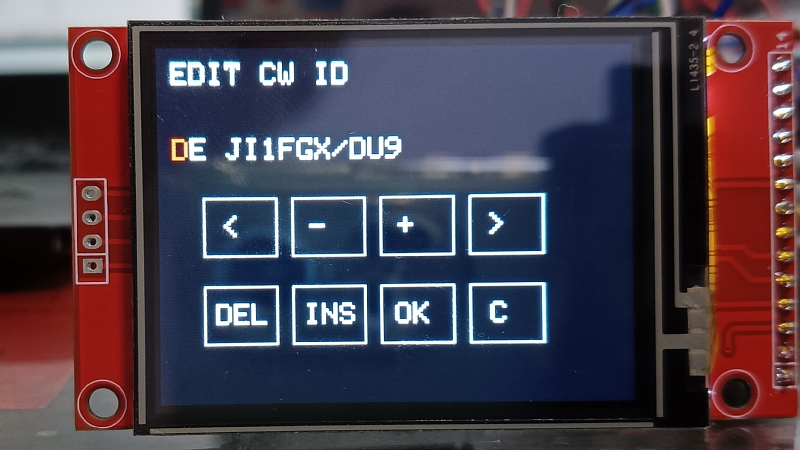 |
||||||||||||||||||||||
| Repeater controller settings screen. The touch panel only allows you to set frequently used items. The configuration program allows you to edit all parameters and save them to the EEPROM of the repeater controller. 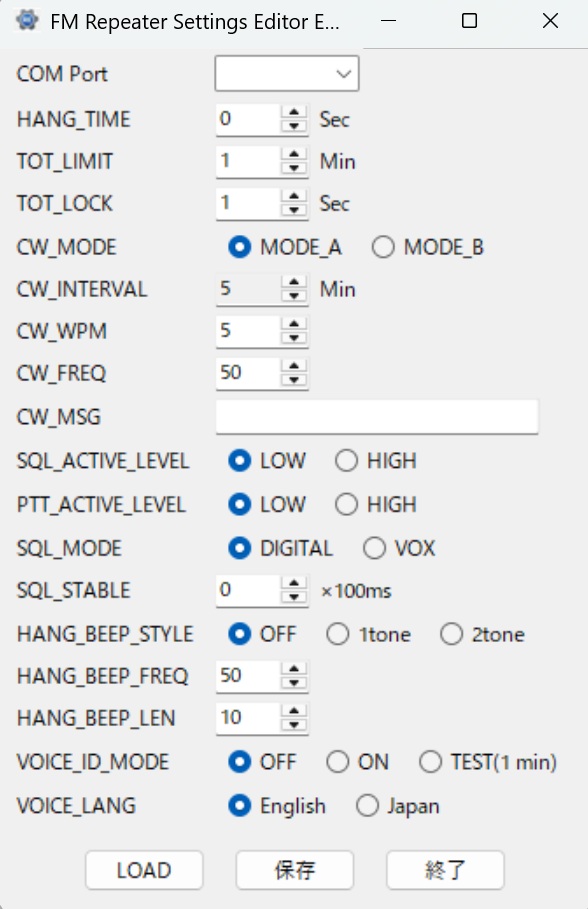 |
||||||||||||||||||||||
|
||||||||||||||||||||||
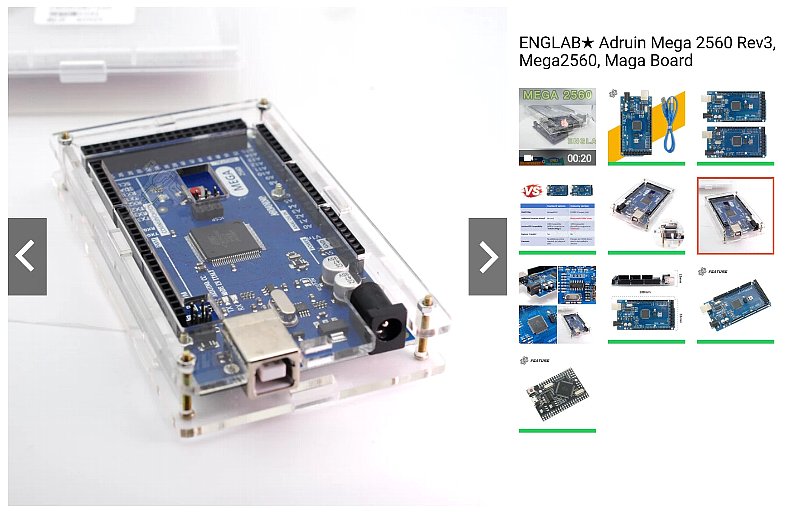
| Mega 2560a with RTC DS3231, DFPlayer, LCD screen with touch panel, and radio interface. Click to see larger size.  |
||||||||||||||||||||||
| Double-sided board made with KiCAD. Click to see larger size  |
||||||||||||||||||||||
Click to see larger size.  |
||||||||||||||||||||||
Analog interface board. |
||||||||||||||||||||||
| February 2, 2026. February 14, 2026. | ||||||||||||||||||||||