JTDX AutoRun Ver0.7.7 — Updated: October 26, 2026

Download


Previous version: JTDX_AutoRun_Ver0.5.0.zip
Previous version: JTDX_AutoRun_Ver0.5.5.zip
Previous version: JTDX_AutoRun_Ver0.6.0.zip
Previous version: JTDX_AutoRun_Ver0.6.2.zip
Previous version: JTDX_AutoRun_Ver0.6.3.zip
Previous version: JTDX_AutoRun_Ver0.7.5.zip
Previous version: JTDX_AutoRun_Ver0.7.6.zip
JTDX_AutoRun_Ver0.7.7.zip
Download
 Downloads: —

Getting started and remote operation

From installation to your first session

JTDX AutoRun assists with repetitive operating tasks, such as resuming transmission and confirming QSO logs.
Ver0.7.7 supports JTDX 3.0.0-rc10.

  1. Extract 20261026_JTDX_AutoRun_Ver0.7.7.zip and run Install_JTDX_AutoRun.exe.
  2. Start JTDX, then register the button coordinates, colors, and other required information in Settings.
  3. Save the settings, restart JTDX and JTDX AutoRun, and perform the operation tests below.
  4. To view logs remotely, install log_receiver and check its connection.

Use the 15-day trial to check that button operations and log display work correctly in your environment.

Remote operation features

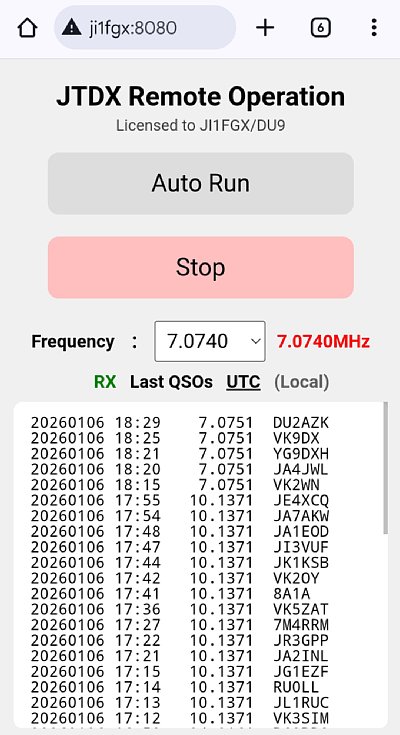
JTDX remote operation is now included with JTDX AutoRun.
You can control JTDX AutoRun from a smartphone or computer.

Features
  • Start and stop automatic operation in JTDX AutoRun
  • Change the operating frequency
  • Display transmit/receive status
  • View the latest 50 log entries
  • Switch log times between UTC and local time
Use a VPN to monitor JTDX remote operation from outside your local network.
 Tailscale VPN software
Software required to display logs during JTDX remote operation
 log_receiver_Ver2.6.6

Main features

JTDX AutoRun has been updated toVer0.7.7.
1) Support for JTDX 3.0.0-rc10
2) JTDX remote operation
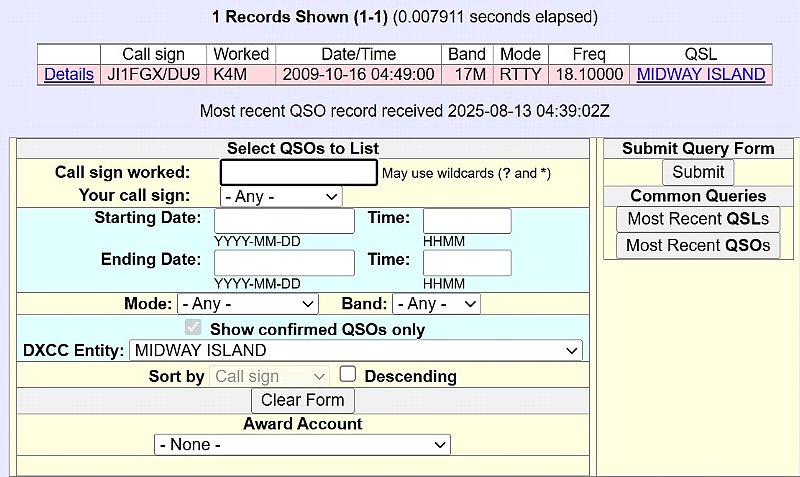
3) Open LoTW from the search results screen
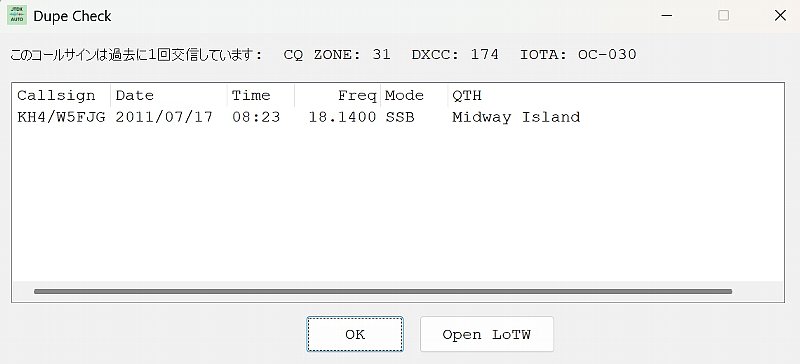
4) Right-click QTH in previous QSO results or a not-worked result to view unworked Entities
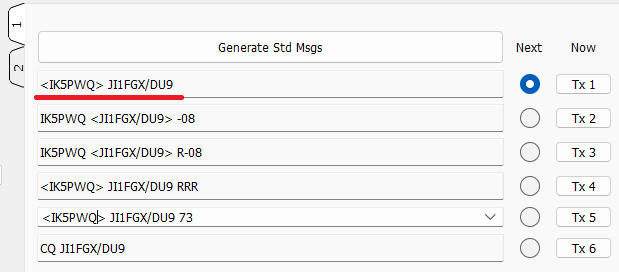
5) Press Enter on a callsign in the Tx1 field to display previous QSOs
6) English and German language support
7)JTDX AutoRunnow displays the number of stations worked during automatic operation.
8) Remember the window position at startup

Main and remote control screens

JTDX AutoRun screen example
  
 JTDX AutoRun screen example

15-day trial and licensing

JTDX AutoRunVer0.7.7is trialware with a 15-day trial period. License registration is required to continue using it after the trial ends.

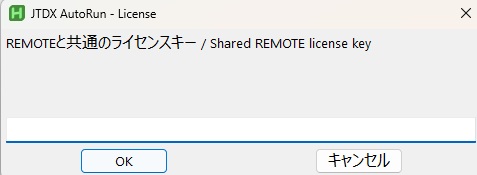
AutoRun and REMOTE share the same license key. If you already have a valid REMOTE key, you can continue using it. You can also register through Settings during the trial.

JTDX AutoRun screen example

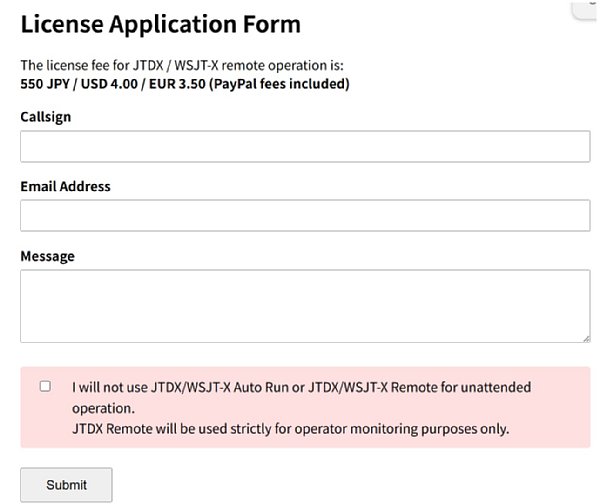
Applying for a license


The license registration fee is USD 4.00.
Please pay via PayPal.

You can apply for a license from either a smartphone or a computer.
https://ji1fgx.com/en/license_apply.php

Your license key will be emailed within 1–2 days after your application and payment have been confirmed.
Enter the key together with the callsign you registered.
JTDX AutoRun screen example
 

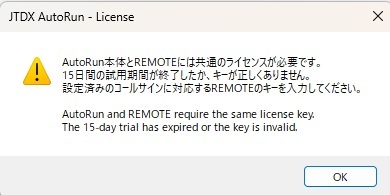
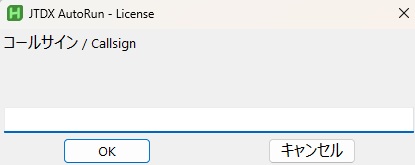
Activation after the trial

After the 15-day trial ends, you must enter your callsign and license key at startup. Use the callsign from your application and the license key shared by AutoRun and REMOTE.

JTDX AutoRun screen example

Installation and included files

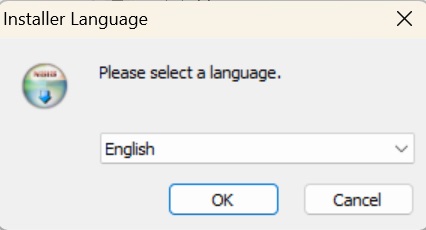
 Run Install_JTDX_AutoRun.exe to open the Japanese/English language selection screen.
This selection determines the display name and icon of the desktop shortcut.
The program itself detects the OS language and automatically switches between Japanese, English, and German.
JTDX AutoRun screen example


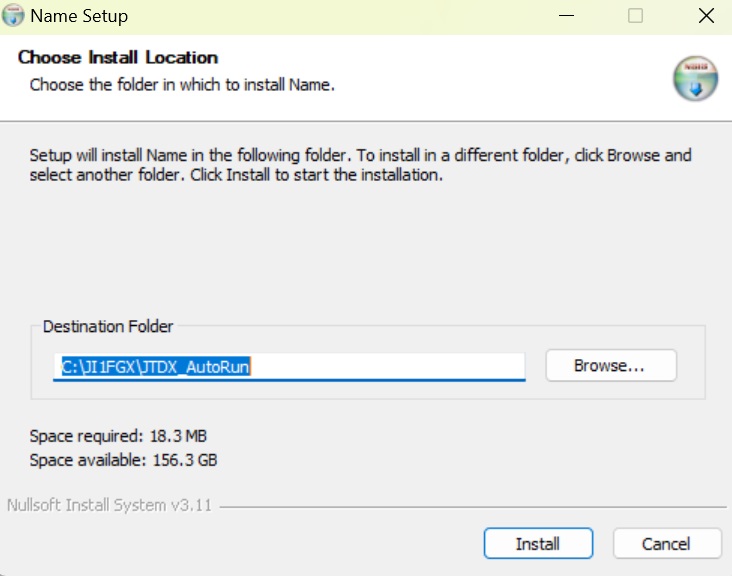
Select the installation folder.
Normally, you should use the default installation folder.
The installation folder isC:\ji1fgx\JTDX_AutoRun\.
JTDX AutoRun screen example


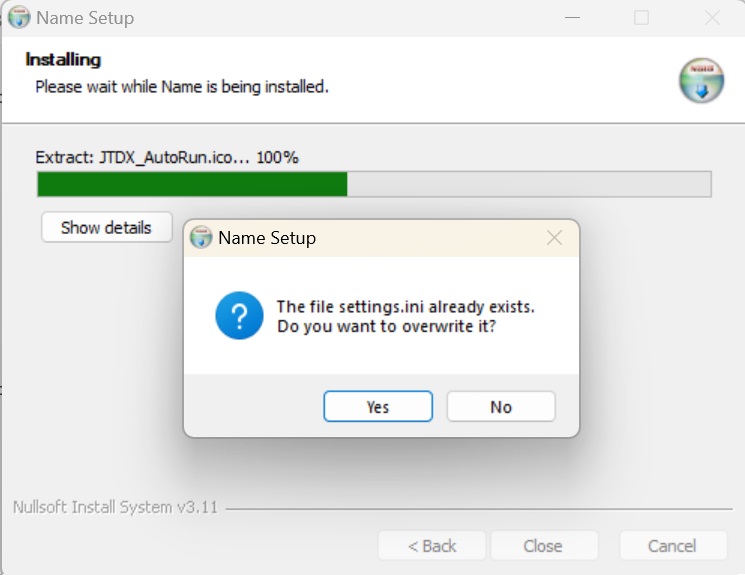
When reinstalling, you will be asked whether to replace C:\JI1FGX\JTDX_AutoRun\settings.ini.
Choose No to keep previously registered JTDX button coordinates and settings.
If you choose Yes, settings.ini is copied to settings.ini.backup before being overwritten.
To restore previous settings, close the program, check the backup, and copy the settings you need.
JTDX AutoRun screen example

Included files

 JTDX AutoRun program  JTDX_AutoRun_Ver0.7.7.exe
 Setup program  JTDX_AutoRun_Setup_ver1.4.exe
 JTDX remote operation  jtdx_remote_0.0.7h.exe
 Installer  Install_JTDX_AutoRun.exe
 Look up a country by callsign prefix  find_entity_service.exe
 QSO logging  adi_to_db.1.0.exe
 SQL database for Entity search  dxcc_list.db
 Japanese manual  JTDX_自動運用プログラムマニュアル.pdf
 English manual  JTDX_Auto_Operation_Manual_EN.pdf
 Japanese icon  JTDX自動運転.ico
 English icon  JTDX_AutoRun.ico

How automatic operation works

 
Operation 
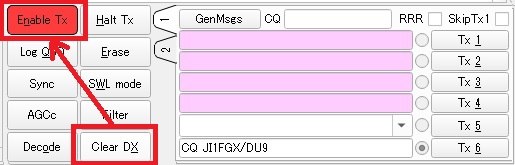
  After you click the JTDX “Enable Tx” button, a timeout causes the program to click “Enable Tx” automatically. 
  If a timeout occurs while calling another station or retrying during a QSO, the program automatically clicks “Clear DX”, followed by “Enable Tx”. 
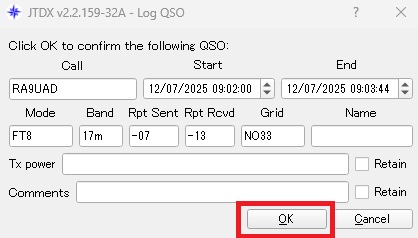
  After RR73 is sent to complete a QSO, the “Log QSO” windowopens, and the program clicks “OK” automatically.
  Click “Stop” to stop automatic operation. 
  The program recovers from write errors involving the JTDX log file wsjtx_log.adi.

Features added since Ver0.5.5
 Press Enter on a callsign in the Tx1 field to display previous QSOs.
 The JTDX window position is retained. On the next start, the window returns to the position it occupied when the program was closed.
 Double-click Stop to click the “Enable Tx” button and return to standby.
 The QSO count is retained when the program is closed and restarted.
 The QSO count resets to zero when the date changes.

JTDX AutoRunassists with repetitive operating tasks through the button operations and status checks described above.
 

Warning — Before using this software

This software is intended to assist an operator at the computer. It is not intended for unattended operation.

If you plan to apply for an award, check the award rules concerning automatic operation in advance. Operate in accordance with the radio regulations of your country. Check applicable laws and license conditions before deciding whether a particular form of operation is permitted.

The author accepts no responsibility for any problems arising from use of this software. Use it at your own risk.

The design philosophy of WSJT-X and JTDX includes avoiding automatic, unattended operation. I understand that this software may therefore attract criticism.

Understanding the control panel


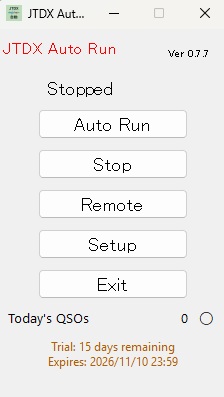
The following control panel appears when you start JTDX AutoRun Ver0.7.7.
Auto Run   Starts monitoring JTDX at the configured timer interval.
 Stop  Sets the timer to zero and stops monitoring.
 Double-click to stop transmission as well.
 Remote  Monitor remotely from a smartphone or computer.
 Settings  Configure the button coordinates in the JTDX window.
 Exit  Closes the program.
 QSO count  Number of stations worked during automatic operation.
 Resets to zero when the date changes.
License status The trial expiration date is shown when no license is registered.
    During automatic operation, a red●appears at the bottom right.

JTDX AutoRun screen example

What happens after a timeout

  If a timeout occurs while calling another station or retrying during a QSO, the program automatically clicks “Clear DX”, followed by “Enable Tx”.
For the JTDX “Tx watchdog timer”, I suggest a shorter setting of4 minutesor5 minutesrather than 6 minutes.
Please note:CQ calling continues indefinitely, so you must monitor the station even during automatic operation.

JTDX AutoRun screen example

Automatic QSO logging

When the Log QSO window opens, OK is clicked automatically.
JTDX then moves on to the next CQ using its own built-in behavior.
JTDX AutoRun screen example

Initial setup: registering button coordinates

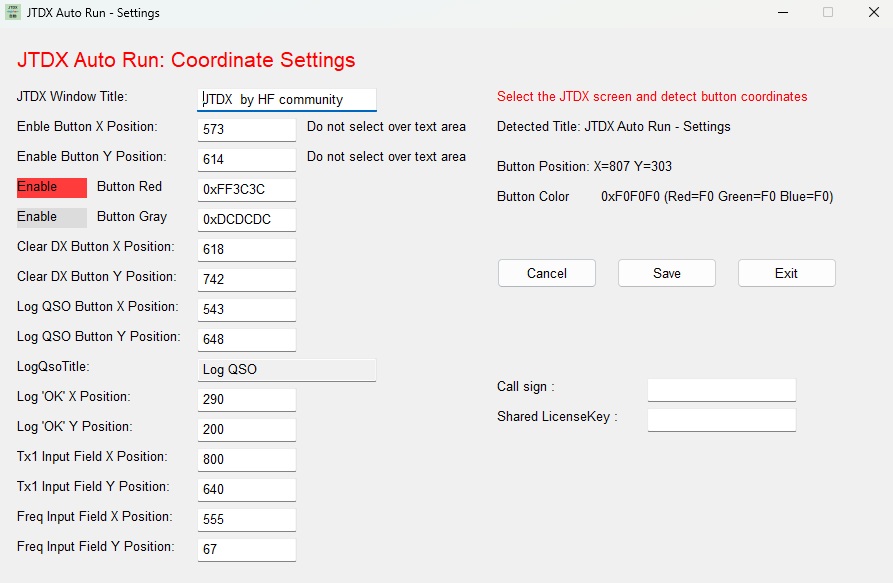
Before first use, register the button coordinates in Settings.
If you resize the JTDX window, register the button coordinates again.

The screen below opens from Settings.
Activate the JTDX window and check the following items.
 Register the coordinates of the Enable Tx button.
 Capture red for transmission and gray for standby.
 Register the coordinates of the Clear DX button.
 Register the coordinates of the Log QSO button.
 Register the coordinates of the OK button in the logging window.
 Register the coordinates of the OK button in the write-error dialog.

To display this dialog, temporarily set wsjtx_log.adi to read-only in its file properties
to trigger a write error. After registering the coordinates, always clear the read-only setting so that the log can be written again.
 Register the coordinates of the Tx1 input field.
 Used for QSO log search and Country search.
 Freq field: register the coordinates of the input area in the Freq combo box.
 Callsign: required for JTDX license registration.
 License key: enter your JTDX license key. 
 
JTDX AutoRun screen example

Testing after setup

 
Operation tests 
Click Auto Run on the console.
Click Enable Tx in JTDX so that it turns red.
 Double-click Stop on the console.
If Enable Tx turns gray, its coordinates have been registered correctly.
 Click Auto Run on the console.
Enter a test string in the JTDX Tx1 field.

Click Enable Tx in JTDX so that it turns red.
Click Clear DX so that Enable Tx turns gray.
Wait until the text in Tx1 disappears, Enable Tx turns red, and CQ transmission begins.
If this happens, the Clear DX button coordinates have been registered correctly.

Checking QSO history and country information

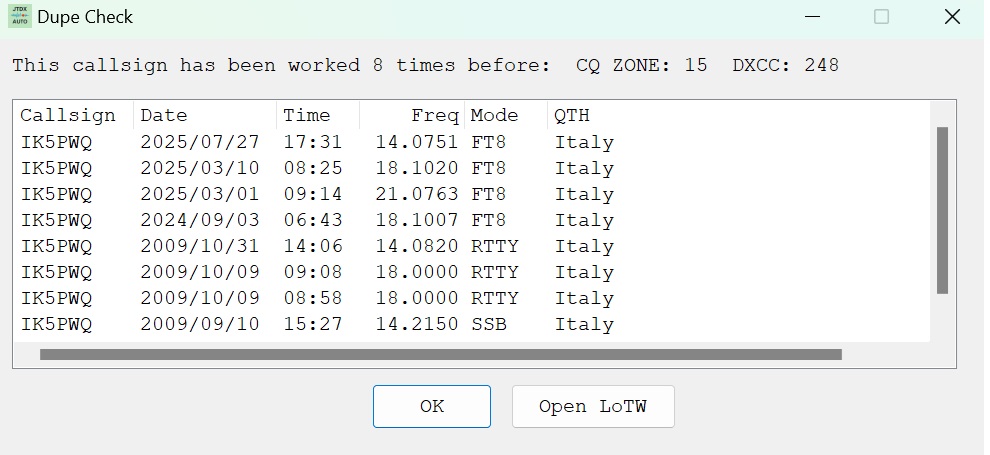
If you have worked the station before, the QSO list, CQ Zone, and DXCC number are displayed.
Double-click the displayed callsign to open QRZ.COM.
Double-click the country name to open Google Maps.
Right-click the country name to see whether it is unworked or how many times you have worked it.

JTDX AutoRun screen example

Searching by prefix


If there are no previous QSOs, the result is shown as not worked.
You can also search using just a prefix.
It makes it easy to find out which country a prefix belongs to and learn more about that country.

Checking LoTW

 
Click Open LoTW to open LoTW and check confirmation status.
You need a LoTW account to use Open LoTW.

JTDX AutoRun screen example

Importing previous logs

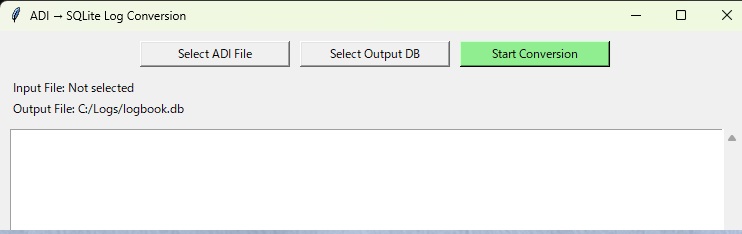
To use log search, convert your previous ADI log files into an SQL database.
ADI files from JTDX, WSJT-X, Turbo HAMLOG, and Logger32 have been tested.
In the extracted folder, run theadi_to_dbconversion program.

To record WSJT-X and JTDX QSOs in real time, install the separately distributed log_receiver_Ver2.6.6.

The separately distributedlog_receiver_Ver2.6.6is required.Download here

JTDX AutoRun screen example